Whole Wheat Flour Crepe

0 comments


Ingredients:
1) Whole Wheat Flour Milk - (obtained from one cup of whole wheat flour after removing gluten)
2) Melted Butter - 2 Tbsp
3) Sugar - 1/4 Cups (increase or decrease as per taste)
4) Egg - 1
5) Milk - 1/4 Cup
6) Cream Cheese , Jam , powdered sugar for garnish
Preparation:
1) Allow the obtained whole wheat flour milk sit undisturbed for some time, remove the water that will separate and float above the wheat flour.
2) To that wheat flour(wet - gluten and water removed), add egg, butter, sugar, milk and mix well using a blender.
3) Grease the hot non stick pan with butter and pour the batter using a ladle and allow the crepe to cook on both sides.
4) Assemble the crepe with preferred ingredients. Here, have used cream cheese, jam and powdered sugar.
Enjoy whole wheat flour crepe !!!

Continue reading →

Whole Wheat Porridge

0 comments


Ingredients
1) Whole Wheat Flour Milk - (obtained from 1/2 cup of whole wheat flour after removing gluten)
2) Milk - 1/3 to 1/2 Cup
3) Sugar - 1/3 Cup (increase or decrease as per taste)
4) Cardamom powder (elachi powder) - 1 Tsp
5) Saffron for garnish
Preparation:
1) Place a pan on medium heat, add the extracted whole wheat flour milk.
2) In the same pan, add normal milk and keep stirring.
3) Within few minutes (5 -8 min) the milk will start to become thick in consistency.
4) Add the cardamom powder and sugar and allow it cook for few more minutes.
5) Finally garnish with saffron and serve whole wheat Porridge !!!
Continue reading →

Mint : Growing from Cutting

0 comments

Mint is a very aromatic herb and can be grown very easily at home which requires less of maintenance (can be grown even on kitchen counter top). Mints are used in cookingherbal medicinearomatherapyMints grow well in moist and well drained soil.


Continue reading →

South Indian Bridal Head Pieces

0 comments


South Indian Bridal Head Pieces shown in this instructable is a beaded version of bridal head pieces that is worn by the brides in their wedding ceremonies and also by the young girls during festivals and other ceremonies. It is popularly known as the "Jadai Alankaram". The design and colors used can be modified depending the brides dress.


Step 1: Items Required


1) OHP Clear sheet
2) Half Pearl stickers
3) stick on Rhinestones/ Rhinestone stickers
4) Fabric glue or E6000
5) Felt
6) String (Braiding cord)
7) white sheet of paper
8) Bobby Pin

Step 2: Making the design


1) Take a white sheet and trace the desired design on it. One big circle for the center and 5 to 9 medium sized circle depending on the length of the plait.
2) Place the OHP sheet on the top of it and tightly secure it on all the sides.
3) Now start sticking the pearls, rhinestones, glitter stones as desired on the OHP sheet using the design as the reference one by one. Use fabric glue/ E6000 to stick if needed.

Step 3: Making the Head piece


1) When the stickers are completely dry, take the OHP sheet and start cutting along the design.
2) Take the felt and cut it into a small square pieces.
3) Take the string and cut it into 15 cm to 20 cm of length (one piece of string for each small circle)
4) On the back of the small circle, in the center put some glue then place the string and on the top place the felt and secure it tight. Allow it to dry.
5) Insert the piece of felt into a bobby pin, put glue in the middle of the center piece and secure the bobby pin to the design tightly.
Note :
* The small circle design are to be placed on the plait. so requires a string to tie it on the plait.
* Center piece does not require a string it requires a bobby pin.


Continue reading →

Lassi

0 comments


 Lassi is a cooling and refreshing drink to have in the summers. It is a yogurt based drink and very popular in the northern parts of India. Lassi's are either sweet or savory.
Sweet Lassi is made by churning yogurt along with sugar, ground cardamom and saffron(extra richness).

Note:
1) Make sure the yogurt is not sour.(very important)
2) Water can be added to dilute the Lassi.(I have not added water as I wanted it to be thick)
3) Try to use hand mixer/whisk to churn the lassi as it provides a unique taste and frothy texture when compared to a blender.


Ingredients
1) Yogurt / Curd - 1/2 Cup
2) Sugar - 2 Tbsp (as per taste)
3) Ground Cardamom - 1/2 Tsp
4) Saffron/ Kesar - a pinch (optional)
5) Ice cubes
Method:
1) In a bowl, add the yogurt, sugar, ground cardamom, saffron and beat it using a hand mixer.
2) Then add ice cubes and beat it till turns frothy.
3) Pour it in a glass and sprinkle some saffron on top and serve.

Continue reading →

Mango Lassi

0 comments


Lassi is a cooling and refreshing drink to have in the summers. It is a yogurt based drink and very popular in the northern parts of India. Lassis are either sweet or savory.
Mango Lassi is a sweet Lassi which is made by churning yogurt along with sugar, Saffron, cardamom and chopped ripe mango.

Ingredients
1) Yogurt / Curd - 1/2 Cup
2) Sugar - 2 Tbsp (as per taste)
3) Ground Cardamom - 1/2 Tsp
4) Saffron/ Kesar - a pinch
5) Chopped Ripe Mango - 1/4 Cup (frozen or fresh)
6) Ice cubes
7) Chopped Almond for garnish
Method:
1) Grind the chopped mango with 2 tsp of yogurt into a smooth paste in a blender.
1) In a bowl, add the mango paste, remaining yogurt, sugar, ground cardamom, saffron and beat it using a hand mixer.
2) Then add ice cubes and beat it till turns frothy.
3) Pour it in a glass and sprinkle some chopped almonds on top and serve.
Continue reading →

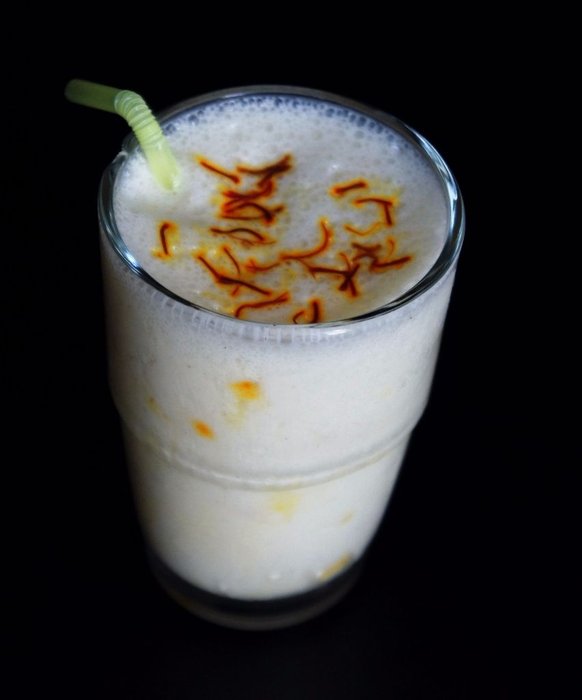
Turmeric Milk

0 comments


Turmeric has been recognized by yogis and ayurvedic healers since ancient times for its manyhealing properties.
Grown mainly in India, the turmeric root is a close cousin to ginger root. It is dried and ground into a fine powder, brilliant gold in color, and used in many Indian recipes.Turmeric is considered highly auspicious in India and has been used extensively in various Indian ceremonies. Even today it is used in every part of India during wedding ceremonies and religious ceremonies.
Turmeric can be consumed as Turmeric Tea , Turmeric Milk, Turmeric smoothie etc.
Lets see how Turmeric Milk is made. 


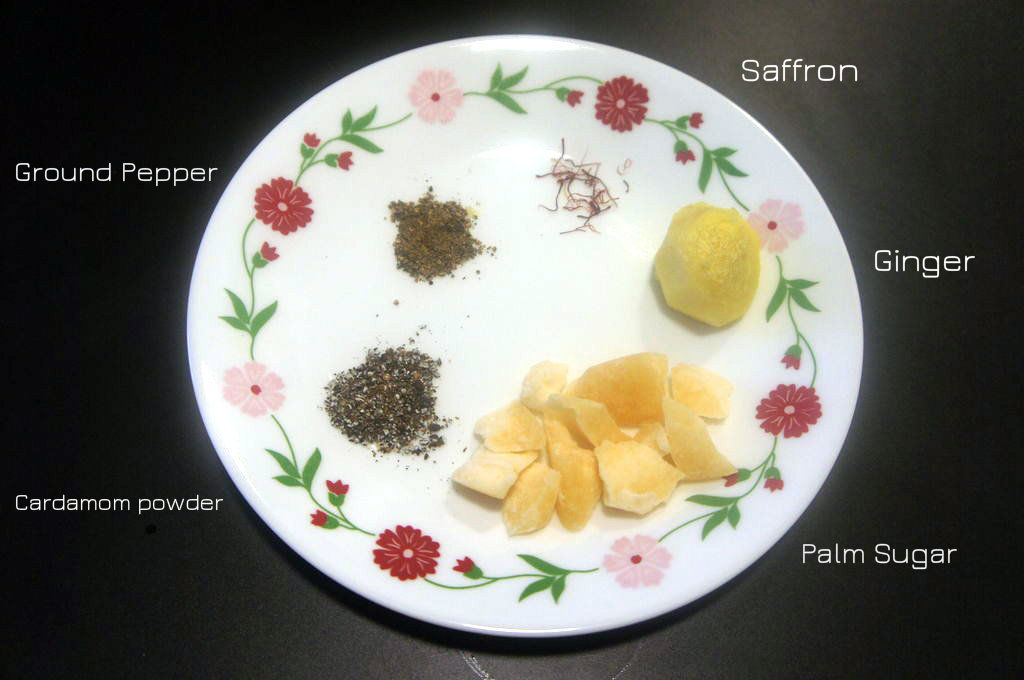
Ingredients:
1) Turmeric Paste - 1/2 Tsp
2) Milk - 1 Cup
3) Ginger grated - Pinch
4) Cardamom powder - 1/8 Tsp
5) Ground Pepper - 1/8 Tsp
6) Palm Sugar - as per taste
7) Saffron - few strands
8) Water - little


Preparation:
* Place a pan on medium heat, add grated ginger and little water to boil (sometimes fresh ginger may curdle the milk.so I boil it in water to prevent that)
* Then add the milk, turmeric paste, ground cardamom, ground pepper and allow it boil.
* Then add palm sugar (panam karkandu) to it. once the palm sugar is dissolved strain it into a glass and top it of with saffron and serve.
Benefits:
* Milk and Turmeric provides bone health
* Powerful anti-oxidant
* Cure cough and cold
* Can treat diarrhea and indigestion
* Helps in blood purification and liver detox and much more
Continue reading →

Turmeric Paste

0 comments


Turmeric has been recognized by yogis and ayurvedic healers since ancient times for its many healing properties.
Grown mainly in India, the turmeric root is a close cousin to ginger root. It is dried and ground into a fine powder, brilliant gold in color, and used in many Indian recipes.Turmeric is considered highly auspicious in India and has been used extensively in various Indian ceremonies. Even today it is used in every part of India during wedding ceremonies and religious ceremonies.
Turmeric can be consumed as Turmeric Tea , Turmeric Milk, Turmeric smoothie etc.
In all these drinks Turmeric Paste is used as a base.

Lets see how the Turmeric Paste is made 


Ingredients :
1) Turmeric powder - 1/4 Cup
2) Water - 1/2 Cup filtered water (Add more water if needed)
3) Ground pepper - 1/2 Tsp (optional)
4) Olive oil/ Almond oil/ Clarified butter - 1/2 Tsp (optional)

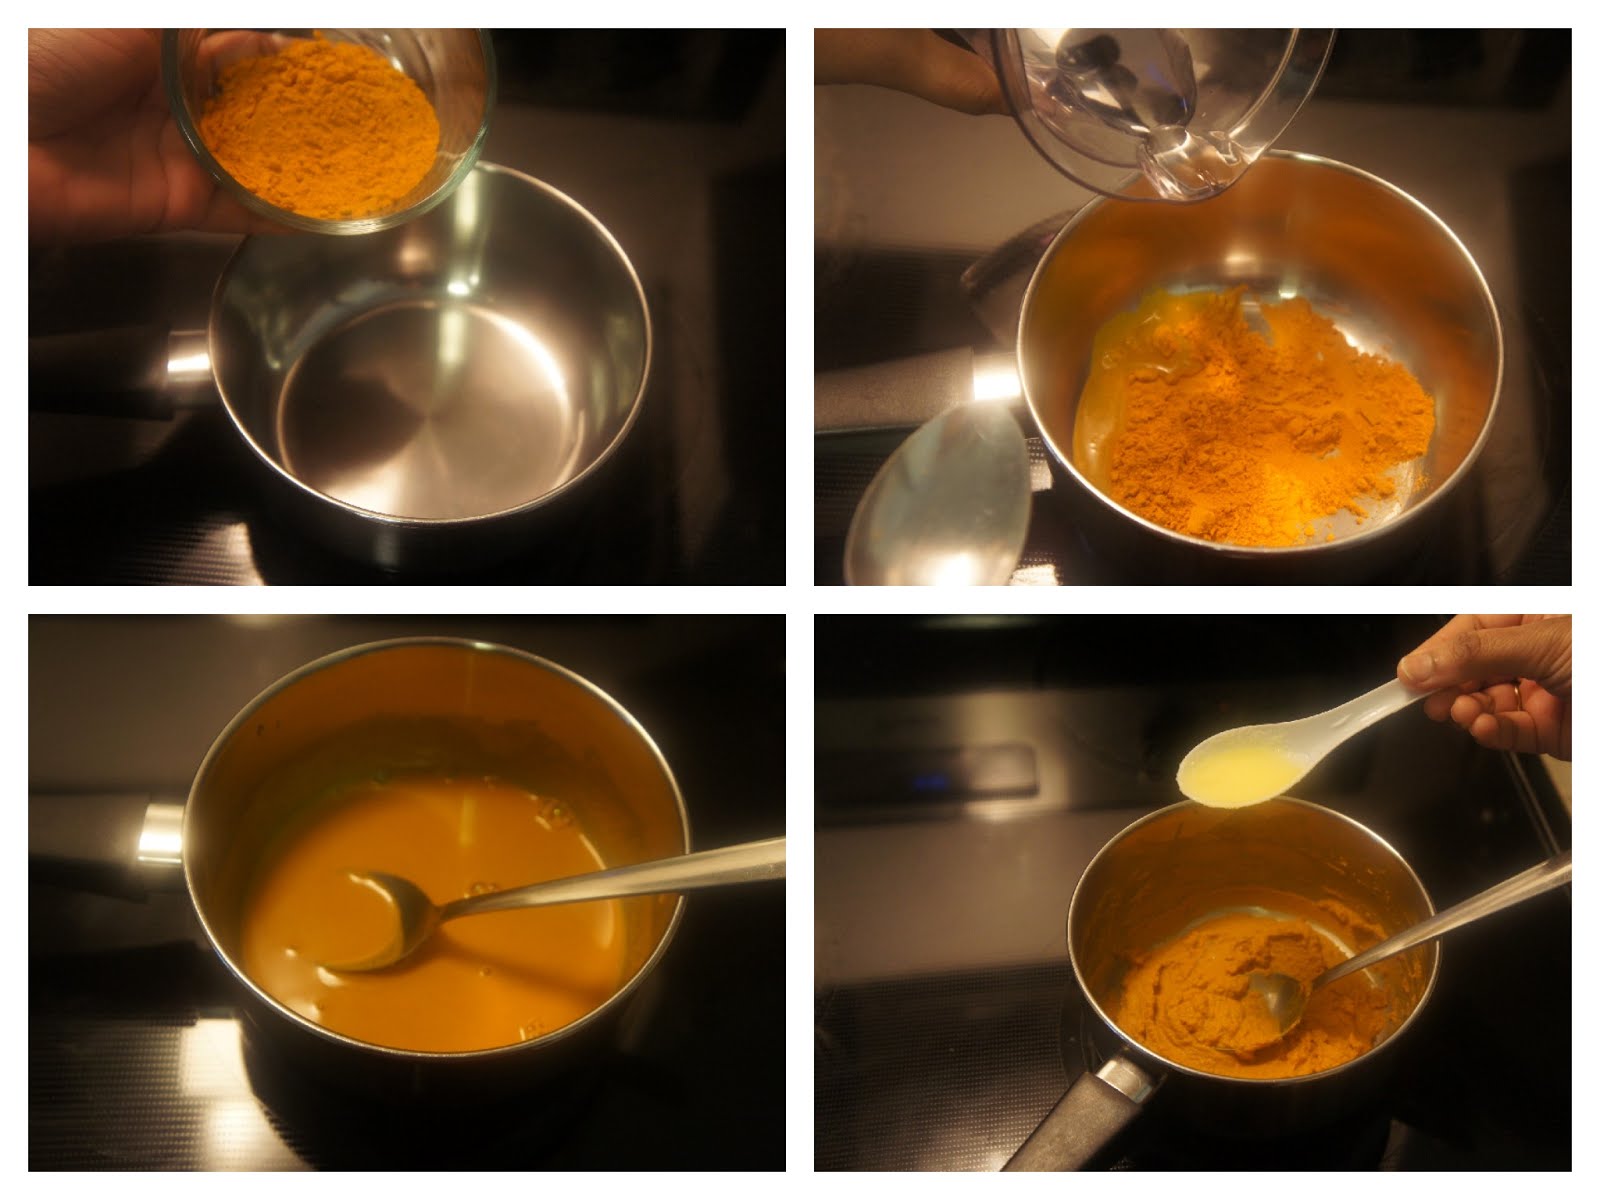
Preparation :
* Place a pan on medium heat and mix the turmeric powder and water.
* Cook till raw smell of the turmeric goes (add more water if needed)
* When the turmeric is completely cooked, add the pepper(optional) and clarified butter and remove from the heat.
* Transfer it to a air tight container and can be stored in the refrigerator for about 2 weeks.


Continue reading →

Whole Wheat Halwa

0 comments


Whole Wheat Halwa is a very delicious and mouth watering dessert made out of the milk extracted from the whole wheat flour, clarified butter(ghee), sugar and nuts. 

Step 1: Ingredients

1) Whole Wheat Flour - 1 Cup
2) Clarified Butter (Ghee)  - 1/3 to 1/2 Cup
3) Sugar - 2 to 2 .5 Cups (increase or decrease as per taste)
4) Cardamom powder (elachi powder) - 1 Tsp
5) Nuts for garnish.
6) Water

Step 2: Extracting the milk from whole wheat flour


1) Knead the whole wheat flour into a soft dough by adding water little by little.(like a chapathi dough) 
2) Soak the kneaded whole wheat flour dough in 5 cups of water for a minimum of 3 hours.
3) The dough would have become very soft after soaking for 3 hours. Mix the soaked dough and water together.
4) Then filter the milk obtained through a mesh/filter.
5) The gluten will be strained out. discard the gluten and keep the whole wheat flour milk.

Step 3: Making the Whole wheat Halwa 


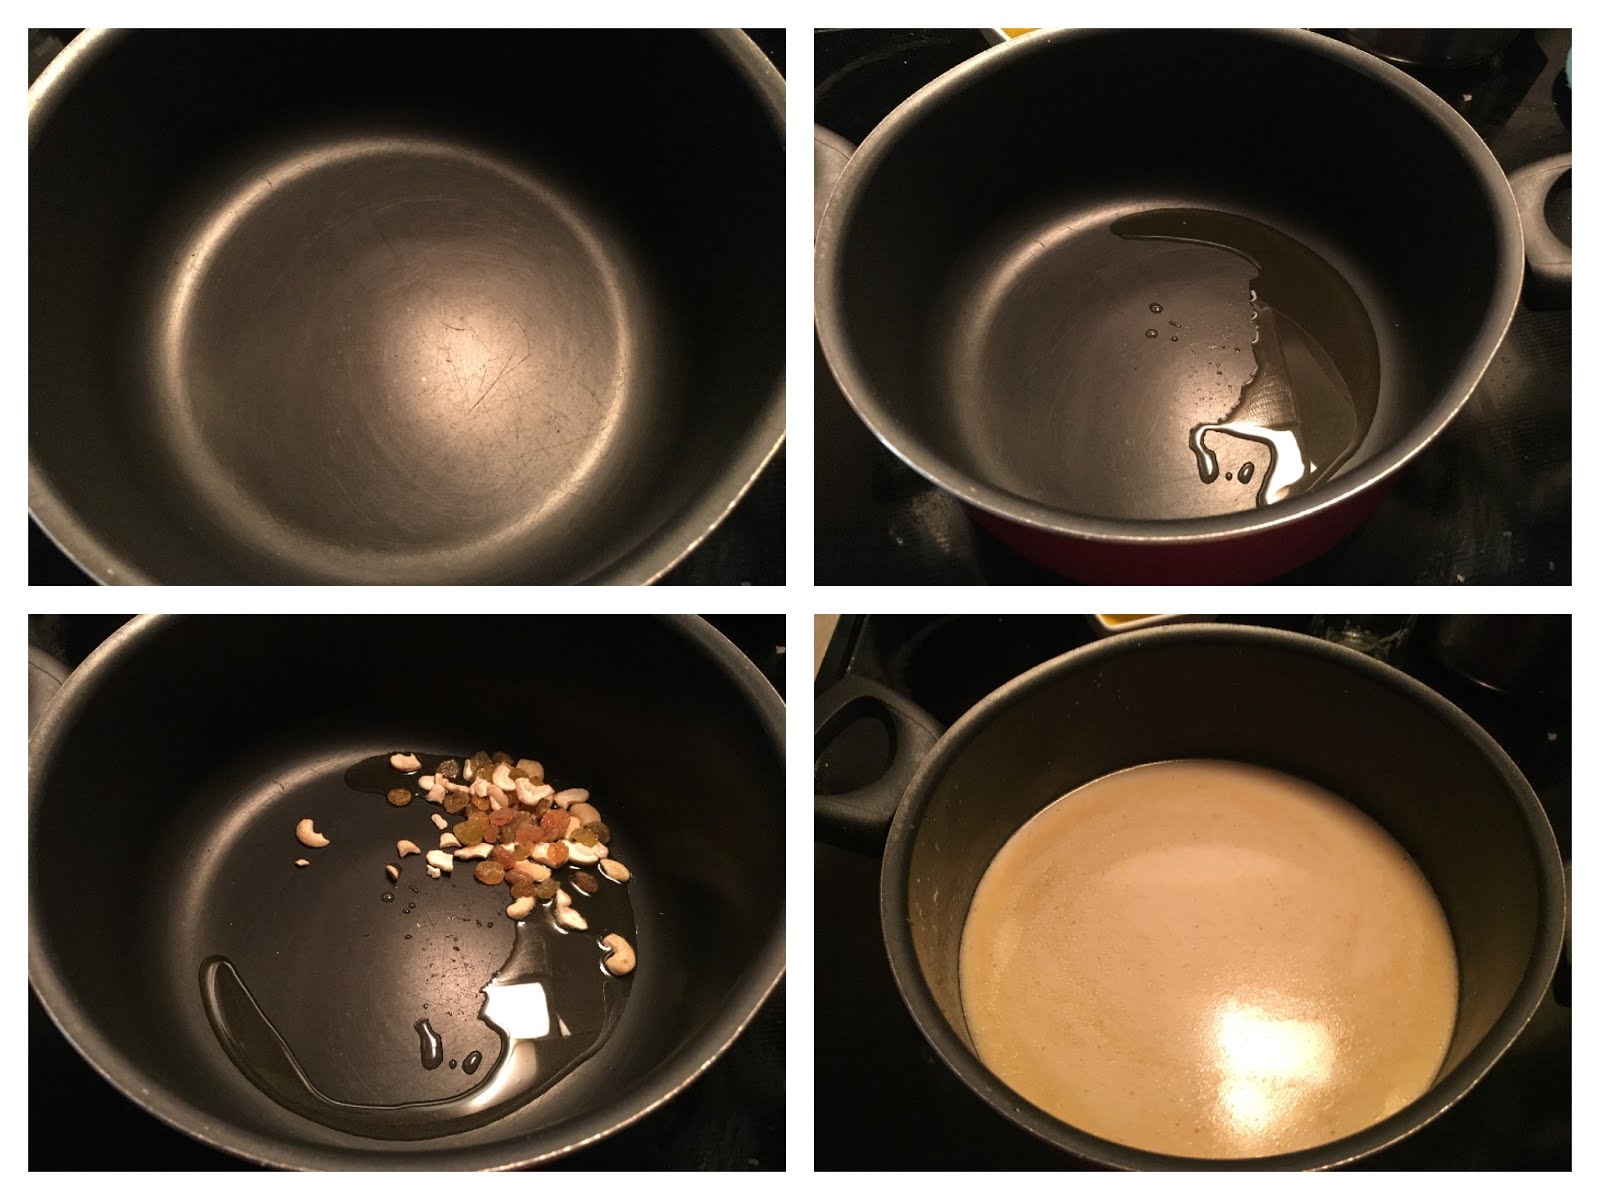
1) Place a non stick pan on medium heat and add 2 Tsp of clarified butter (ghee) and fry the nuts and remove keep it for garnish. 
2) In the same pan, add the extracted milk from the whole wheat flour and keep on mixing.


3) Within few minutes (5 -8 min) the milk will start to become thick in consistency.

4) Once it starts to thicken, add the sugar, cardamom powder.

5) Then keep adding ghee, 1 Tsp at a time till the halwa separates out from the vessel.
Thats when the halwa is done.

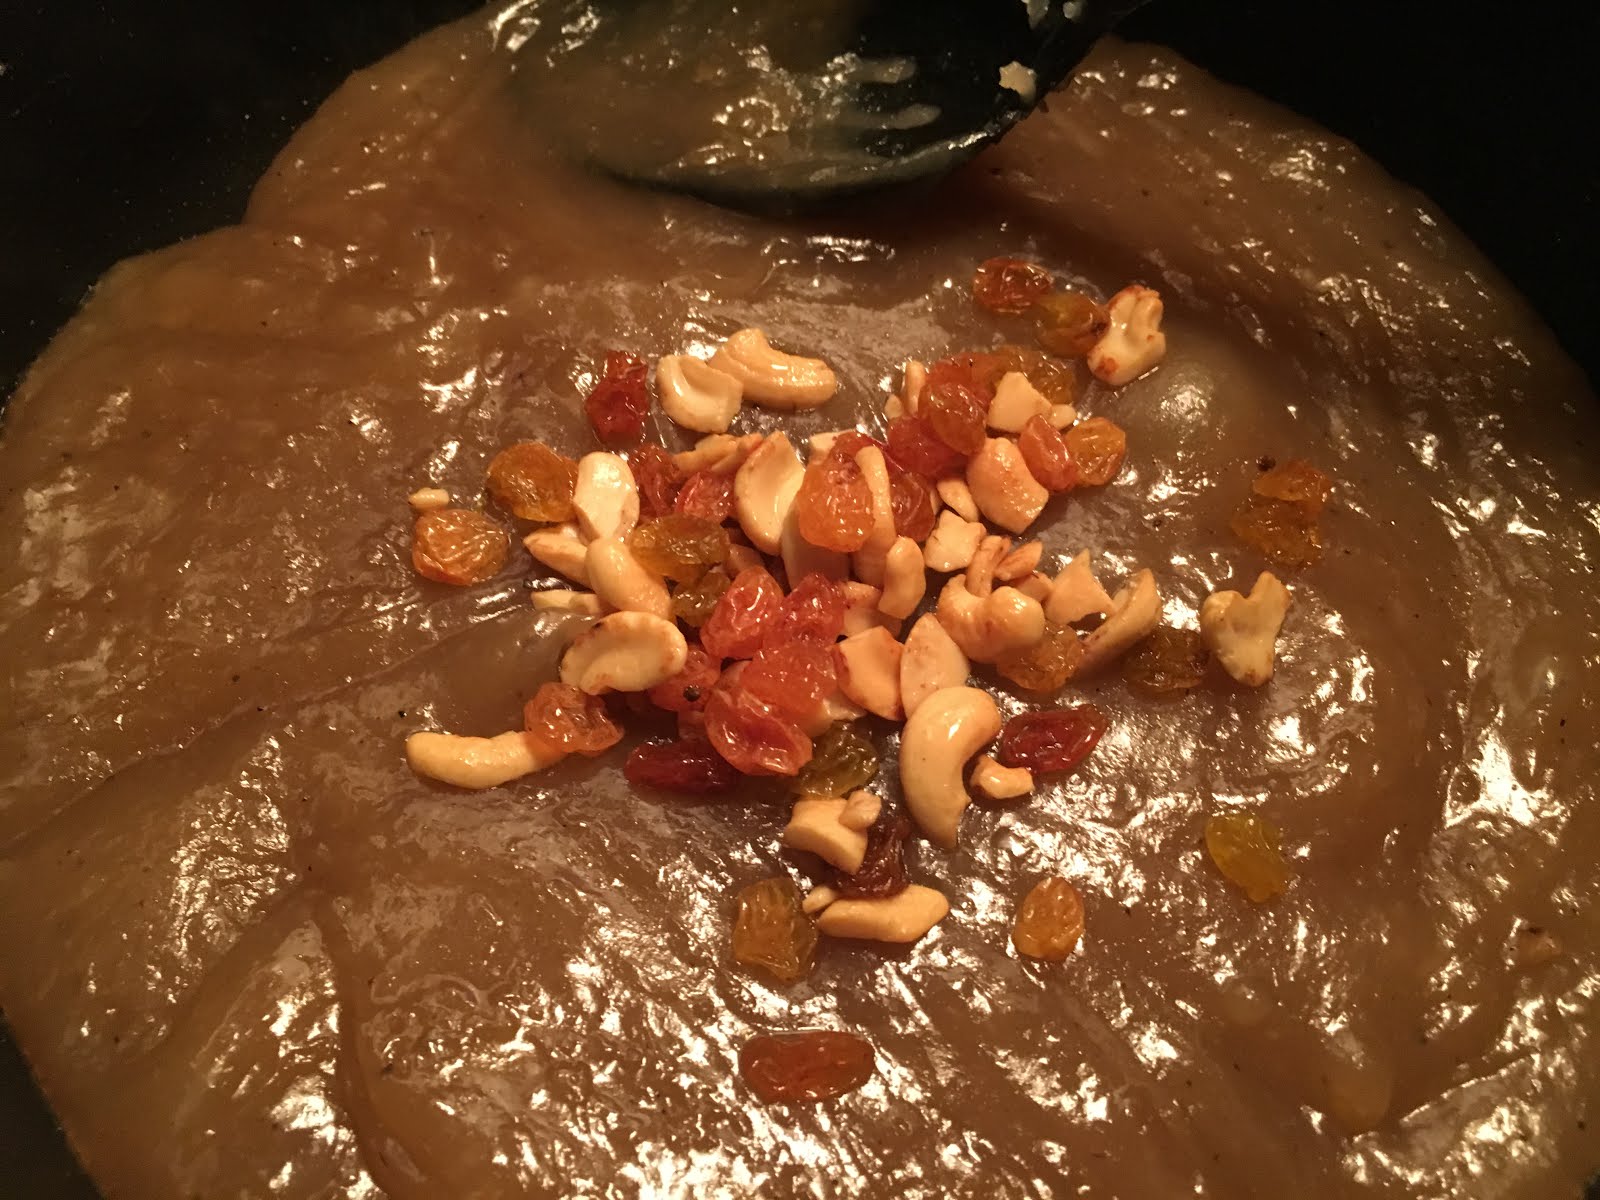
6)  Add the roasted nuts and transfer to a ghee greased plate.

Mouth watering whole wheat Halwa is ready  !!! Enjoy :) 
Continue reading →

Coriander Herb - Regrowing from market bought Coriander Herb

0 comments


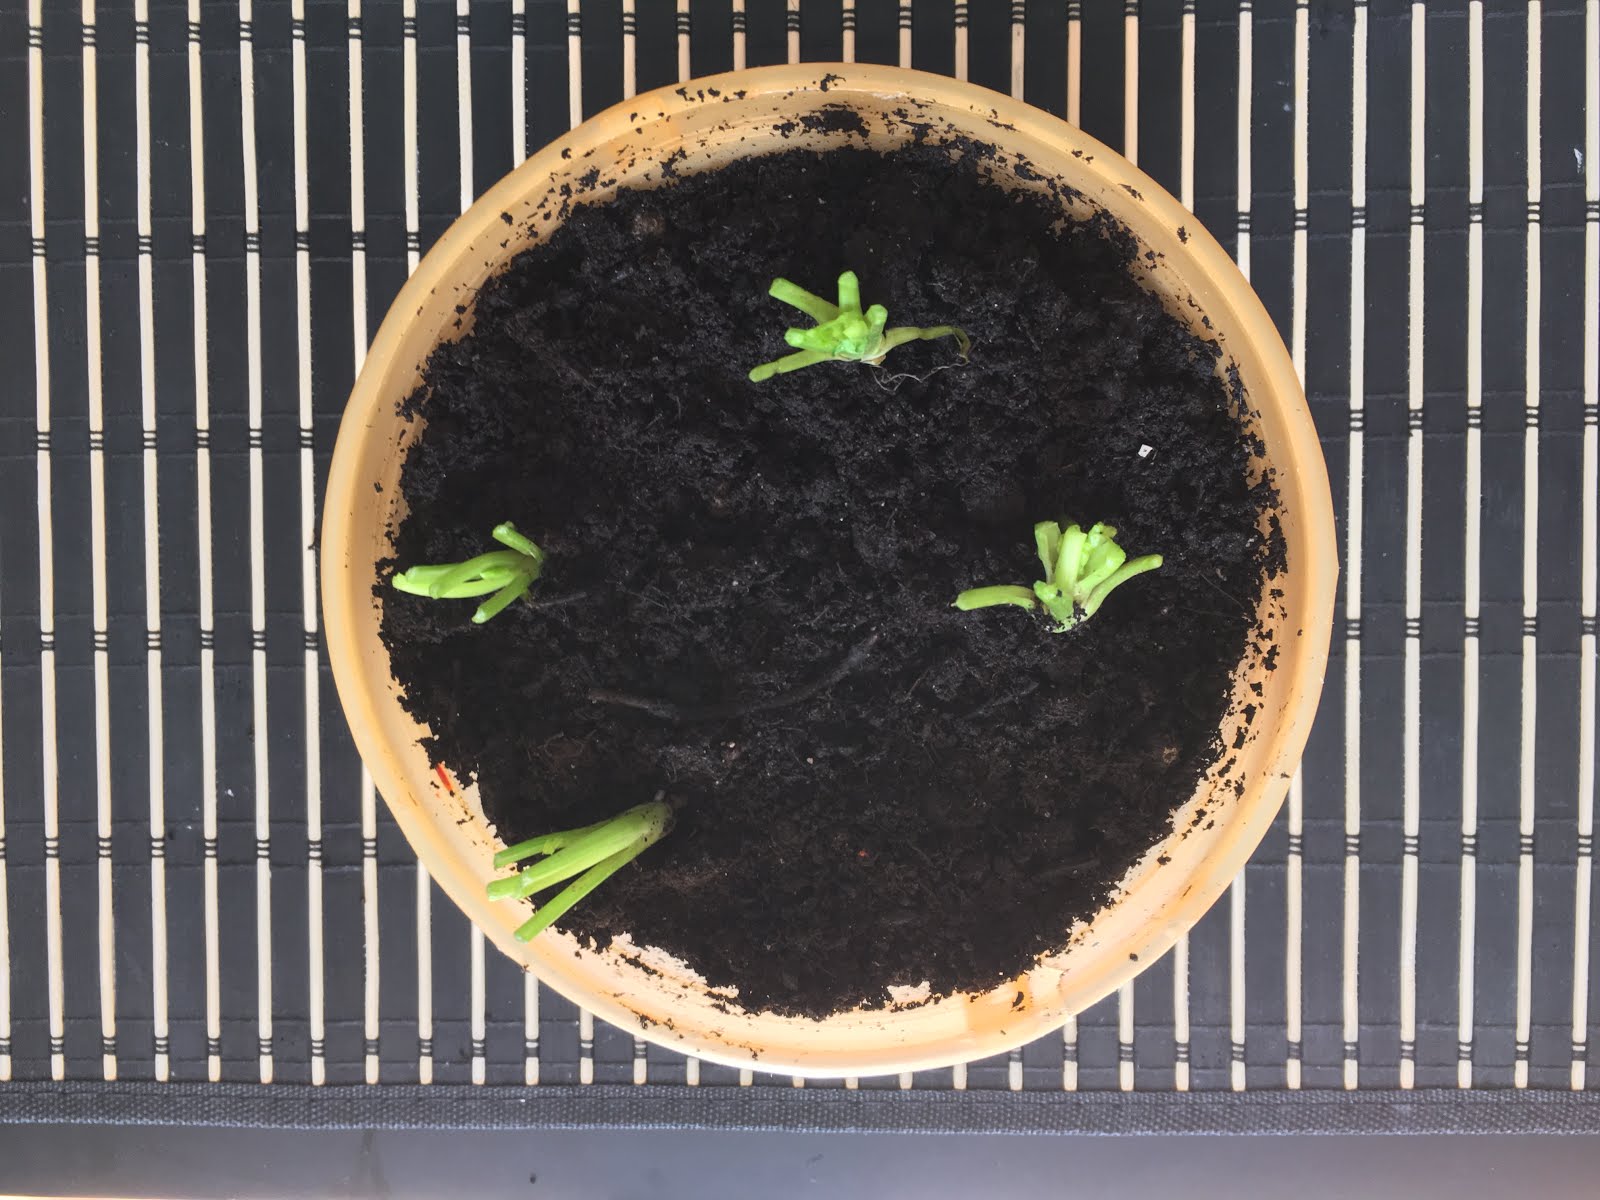
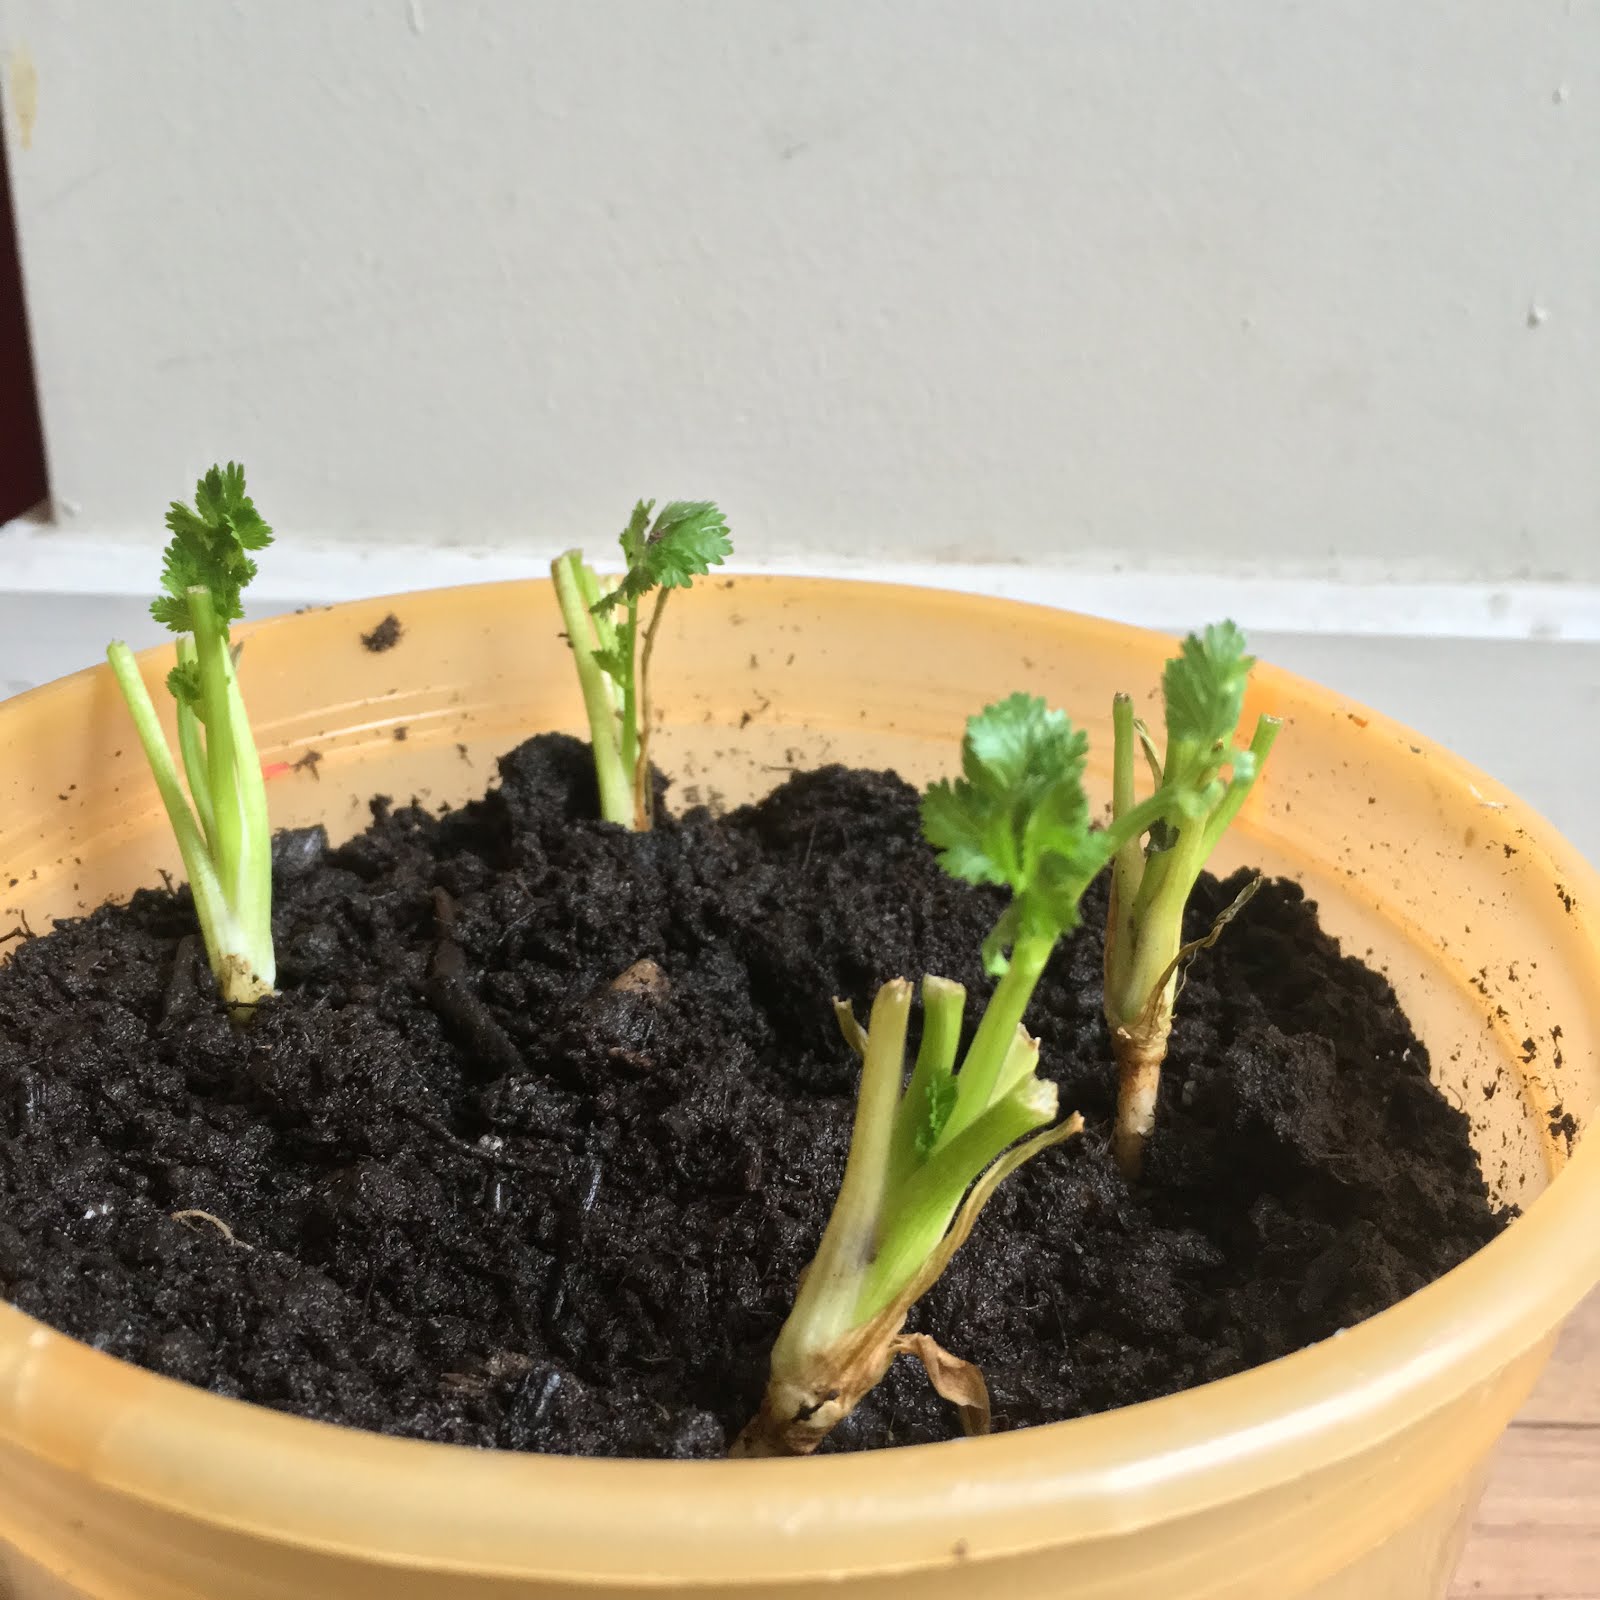
Regrowing the coriander herb from the market bought coriander herb is very simple and easy to do process. Within few weeks time, the herb grows and yielding you with fresh coriander.


Step 1:

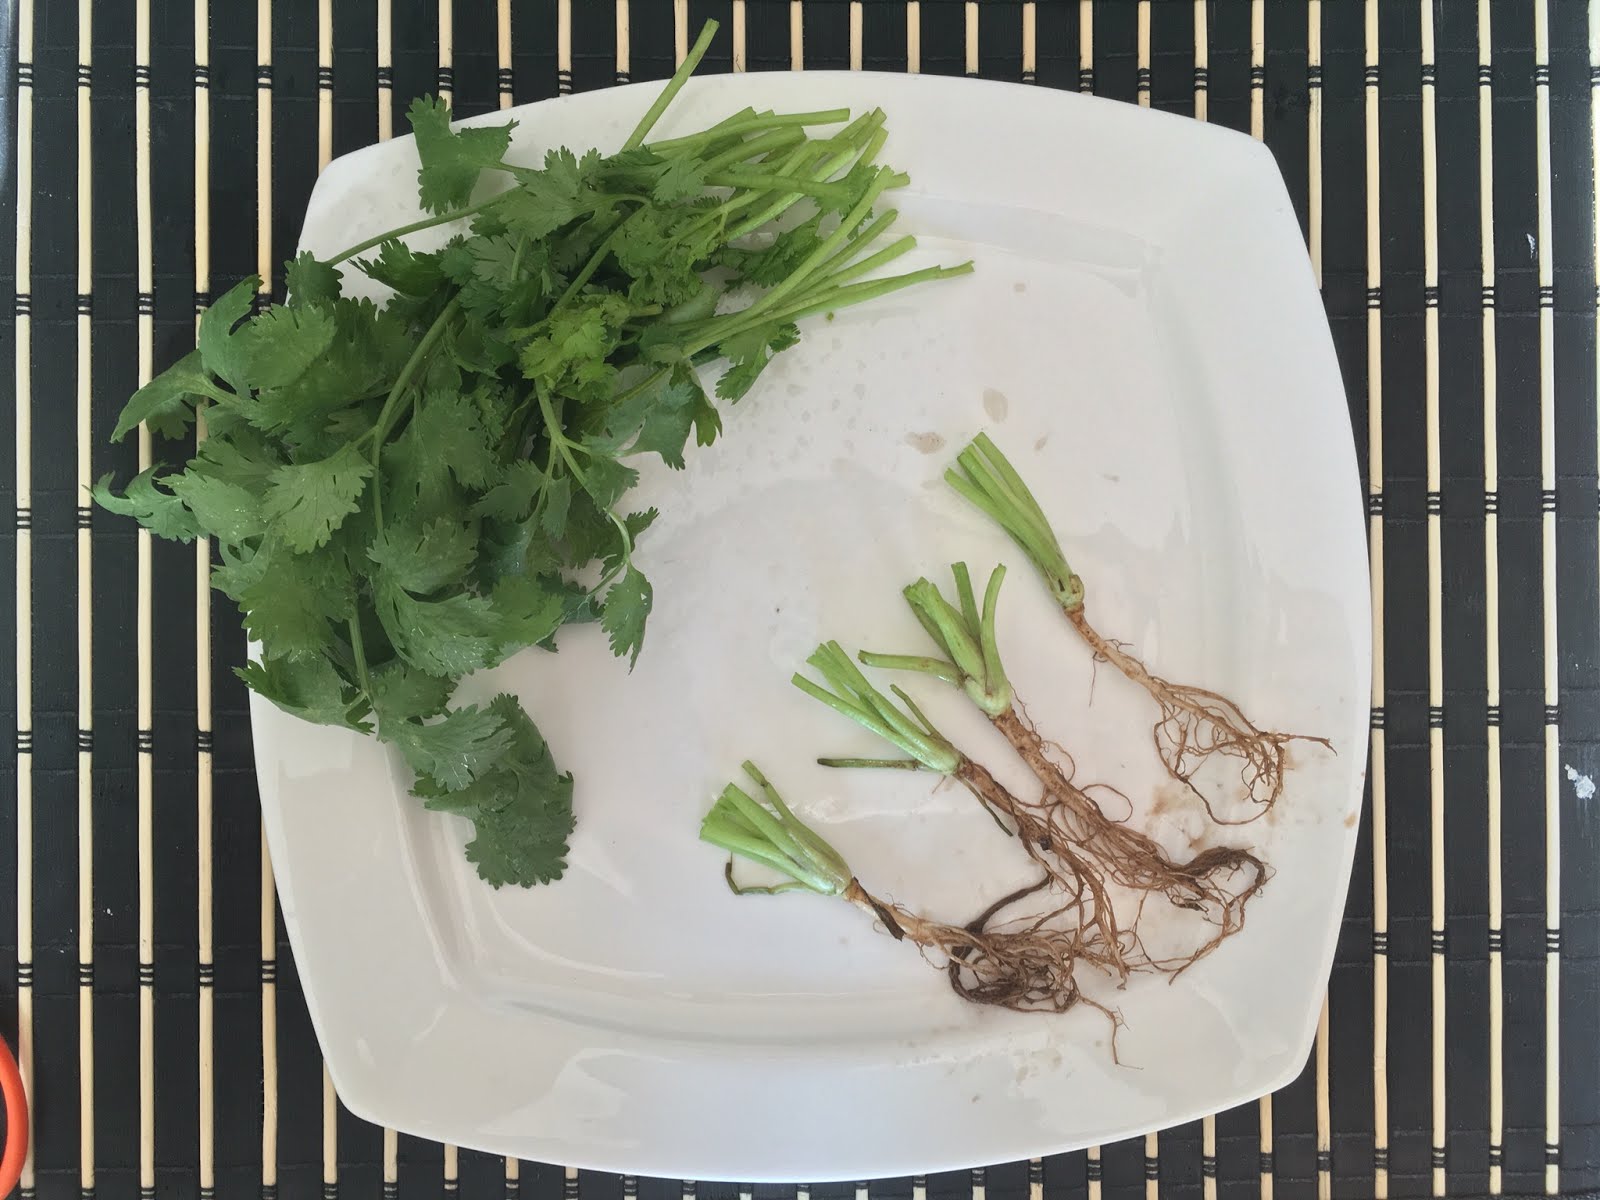
Take the coriander herb plant and cut the bottom of the stem which has the root. Cut the stem one inch from the root.


Step 2:

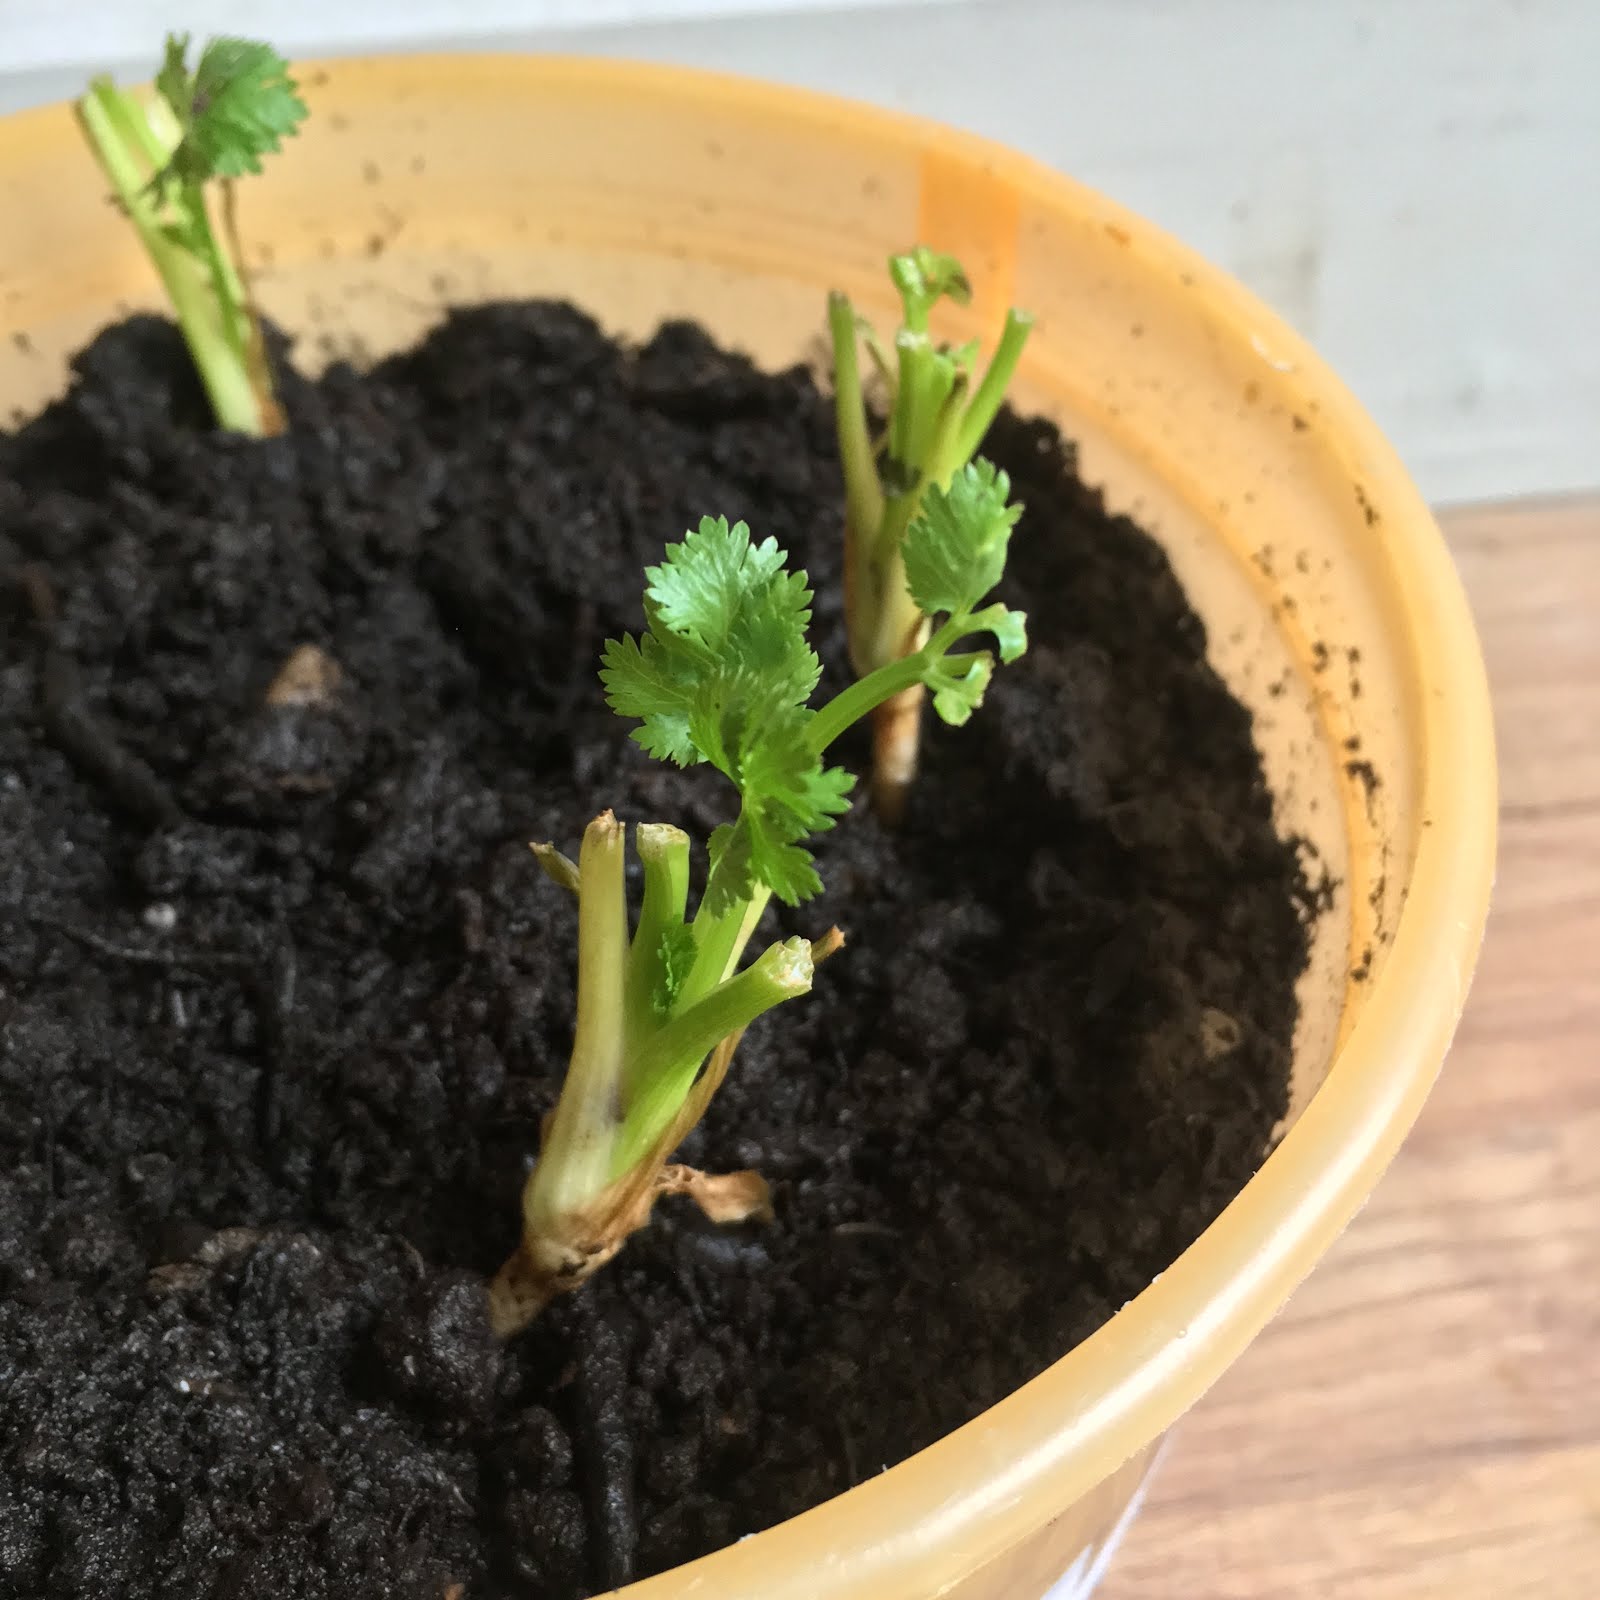
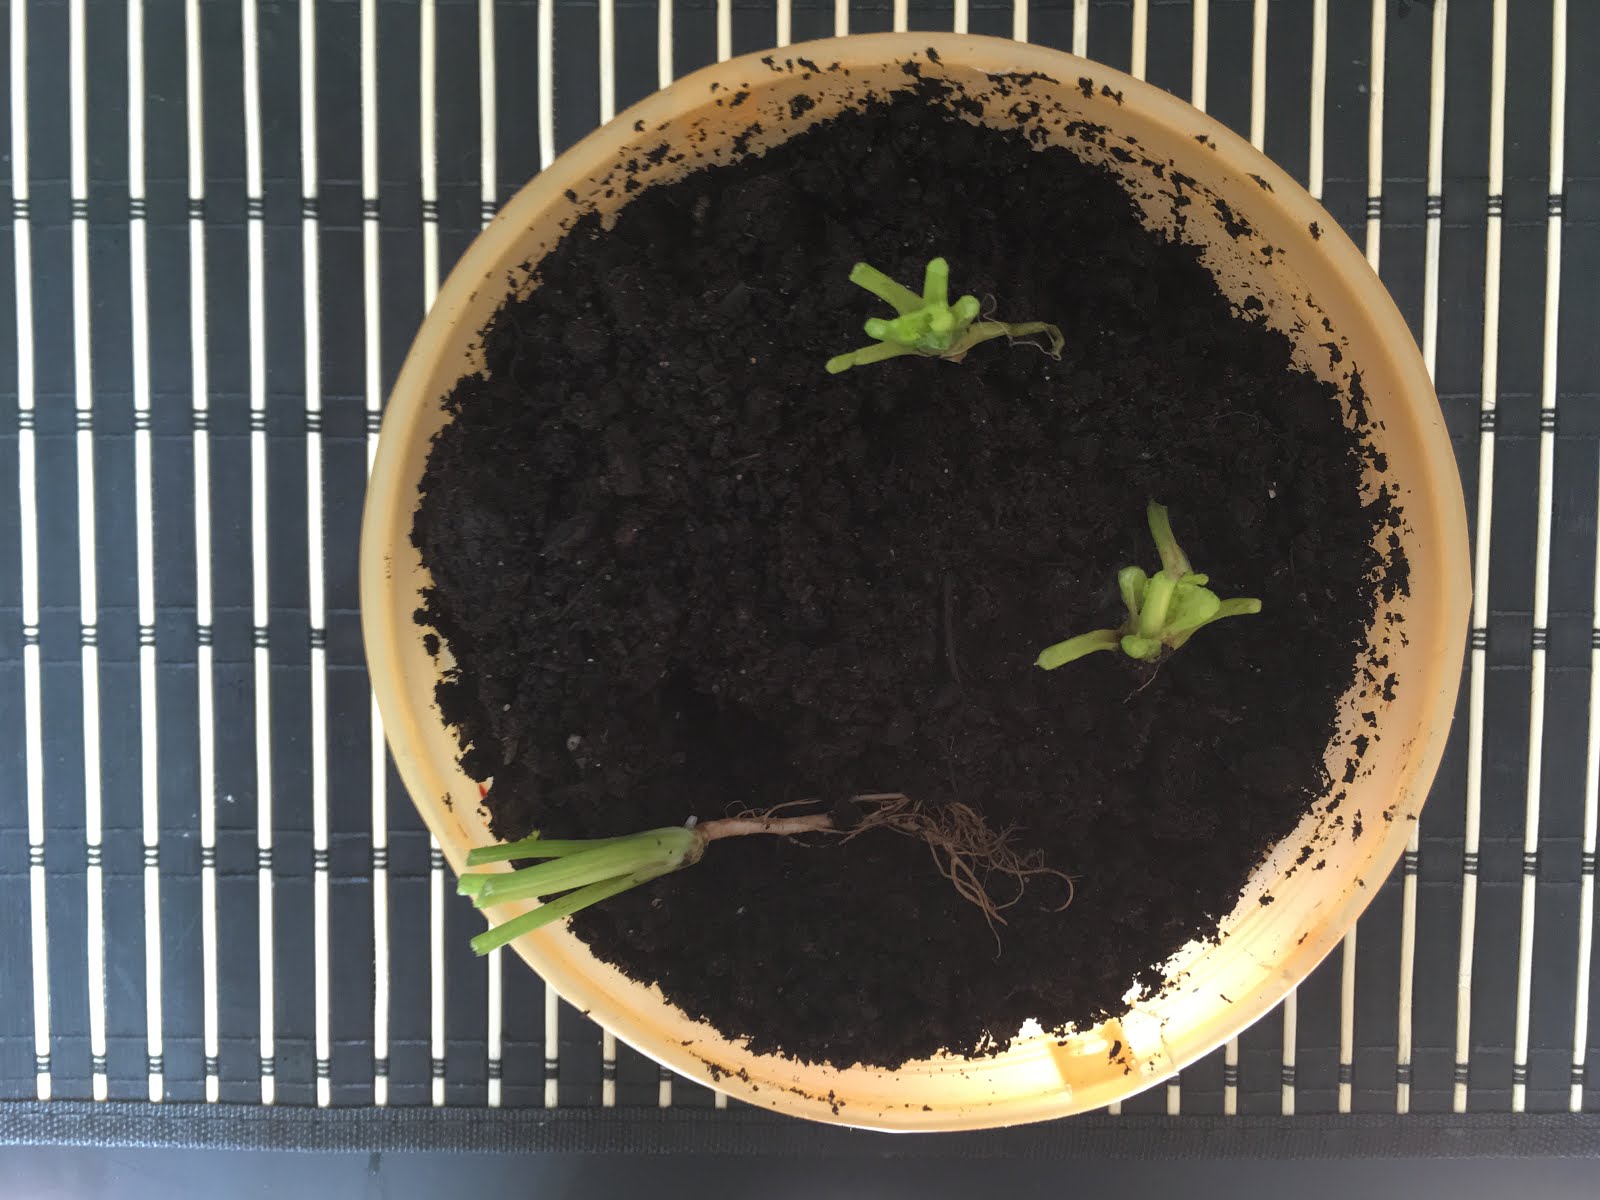
*  Take a pot with good soil and plant the cut coriander herb such a way that the stem stays above the soil and root completely in the soil.

*  The soil should be moist and not wet.

*  Place it in such a place where u get a medium amount of sunlight. If too hot it will burn       down the coriander herb.

*  Within a week time the coriander herb starts to grow. 


Continue reading →

Rainbow Sugar Scrub

0 comments


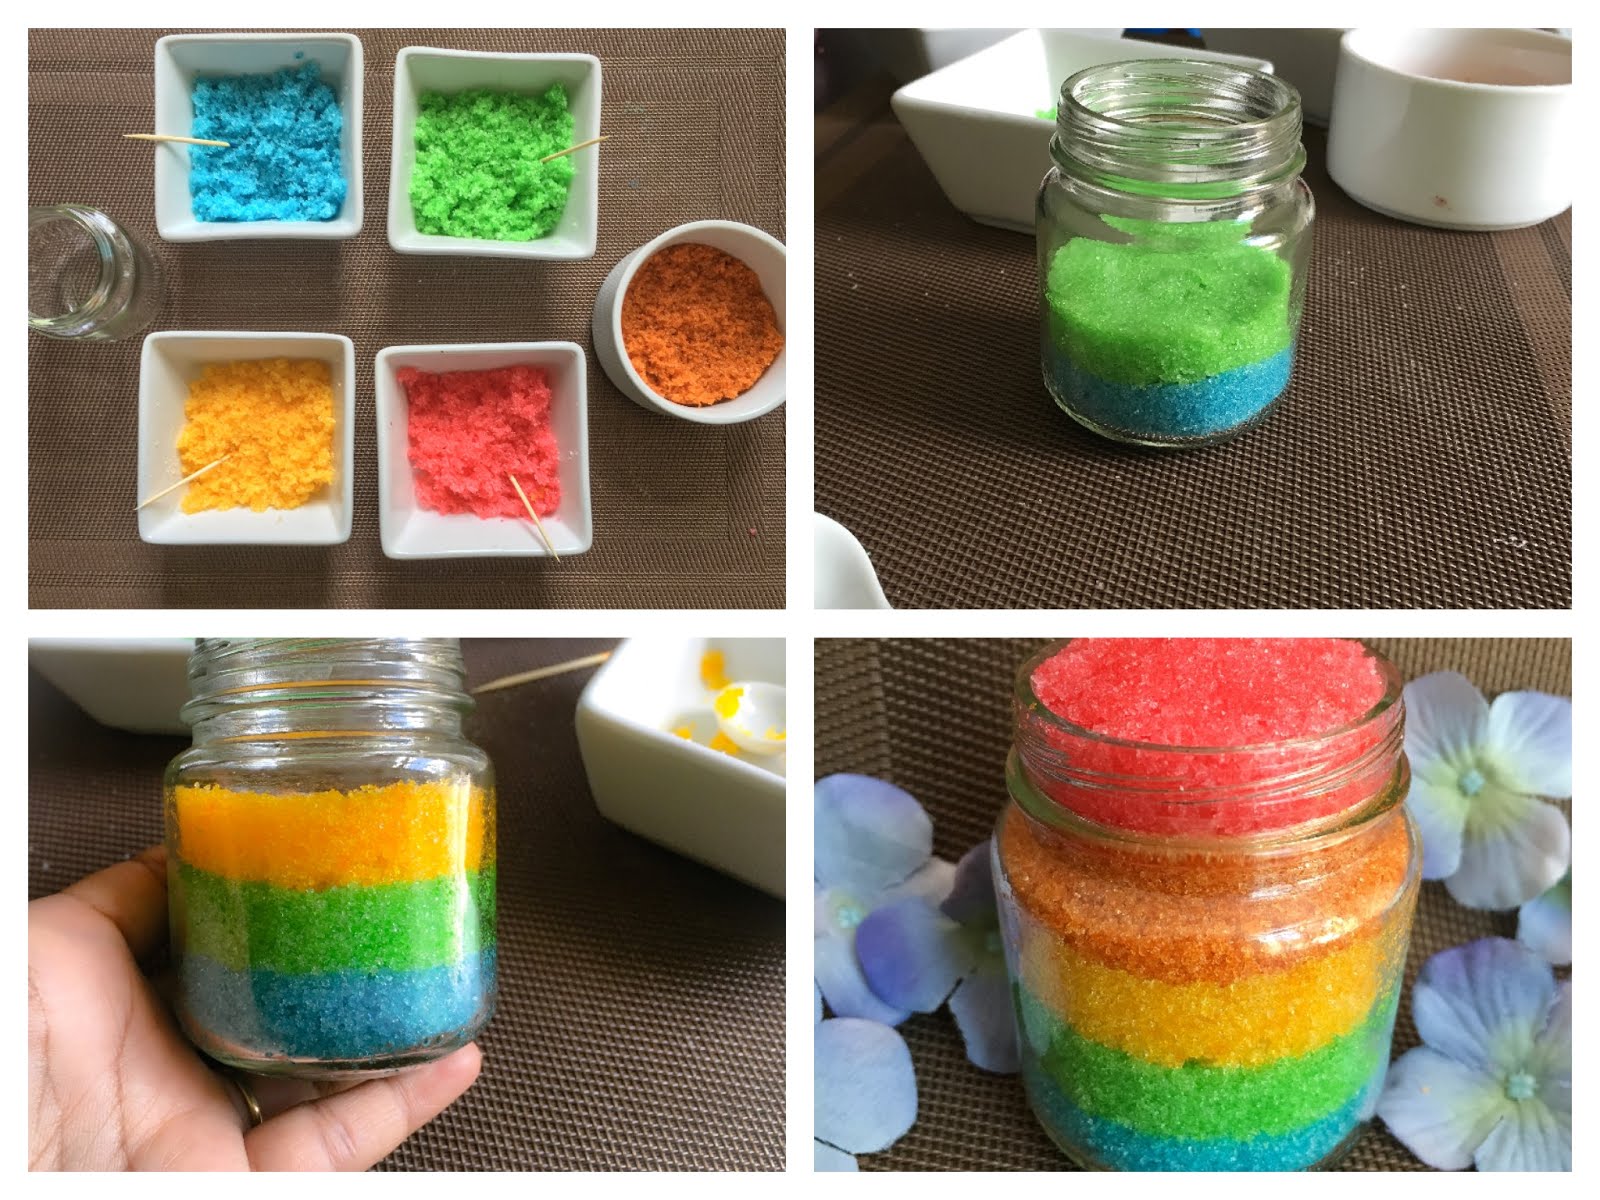
Rainbow Sugar Scrub is very colorful, smells good and refreshing. It can be easily made with the available ingredients at home. Simple to make and contains no chemicals.


Step 1: Ingredients


1) Granulated Sugar - 1 Cup (Organic)
2) Pure Honey - 1/4 Cup
3) Olive Oil - 1/3 Cup
4) Food Color
5) Essential Oils (optional)

Step 2: Making the Scrub


1) Divide the sugar equally in different containers depending on the number of colors chosen.
2) Similarly, divide honey and olive oil equally among the each bowl with the sugar.
3) Add different colors to each bowl.
4) Add desired essential oil to each bowl. (I added peppermint for blue and green, sweet orange for yellow and orange, lavender for red)
5) Mix everything well in each bowl.

Step 3: Assembling the Sugar Scrub

Take a clean glass container to store the sugar scrub, add colored sugar scrub one on top of the other. Slightly pressing down each layer.
Rainbow Sugar Scrub is ready to be used.
Note :
To use it as a Lip Sugar Scrub, instead of essential oil use little of desired fresh juice.(for example lemon juice, orange juice)


Continue reading →

Horlicks Growth Plus : Catch Up on the Lost Growth

0 comments


Lesson from Nature:

I am a strong believer in nature as I have learnt many life lessons from it including the recent one on a necessity of timely growth.

With lots of love and care, I germinated few tomato seeds and enjoyed watching it grow into small saplings. I daily water it, kept it near my apartment balcony window for sunlight. Everything  was perfect but the plant stopped its growth and started becoming weak. I was worried and tried to provide homemade fertilisers like eggshells, coffee grounds and many on my own but nothing helped and my plant slowly started dying.

Finally one day I gave up and put the pot out on my balcony thinking it won't make it. But to my surprise after few day outside my tomato plant started to have new leaves and in few weeks it became stronger and healthier but it was not able to have flowers or tomatoes before the winter frost permanently stopped its growth. I was late in providing the essential nutrients for the plant. If I had acted soon, the plant could have caught up on lost growth. 

Lesson from my daughter's friend:

This made me understand that it is very important to have an adequate growth at the adequate time. Another incident that happened to my 5 years old daughter's classmate, who was obese and had less immune power which caused her to go through lots physical and mental pressure. Most of the time she won't be coming to the school due to sickness.

It all happened one day when I got the chance to see her parents who were sad and was talking to the class teacher about something. I realised they are discussing their daughter's situation and I thought of waiting near the school entrance to talk to them.

After 30 minutes, my daughter's friend's parents came out. I stopped them and asked them about the meeting and I was shocked to hear that my daughter's friend is quite unwell and she is admitted to a hospital to undergo an immediate medical treatment to control her blood cholesterol level.

For the next few weeks, every alternate day I took my daughter to see her friend as it makes my daughter's friend feel happy and that made my daughter's friend's mother and I close friends.

Once after the treatment was completed, I asked her to come over to my house for a lunch on Friday and she came as planned. During that time I asked her to know what went wrong with her daughter. After a little hesitation, she said that the doctors said it is because of the regular unhealthy food and the eating habits at her home were the main reason that impacted their 5 years old daughter's physical and the mental health. She also said that even though the treatment can cure her current physical illness, she was advised to stay away from her unhealthy foods, to do more physical activities and she won't be able to continue the school for the current school year.

This incident and the tomato plant incident has made me think how important is to have an adequate growth at the adequate time. Giving the child a healthy food and good food habits at the early age would make them grow stronger and sharper. Horlicks have been helping and supporting healthy child growth for many generations now.

I can firmly state that it is utmost very important to provide the child an adequate growth for a better themselves, country and the world and Horlicks Growth Plus  helps the Children to catch up on the Lost Growth.
Continue reading →

Ring Murukku (Fried Rice Flour Rings)

0 comments


Ring Murukku (Fried Rice Flour Rings) is a traditional south Indian snackmade during special occasions. It is made using homemade rice flour ,black gramsesame seeds and cumin seeds. The freshly homemade rice flour really enhances the flavor of the Murukku.


Step 1: Ingredients


1) Raw Rice - 2 Cups
2) Urad Dal - 2 Tbsp
3) Red Chilli Powder - 1 Tsp (as per taste)
4) Sesame seeds - 1 Tsp
5) Cumin Seeds - 1 Tsp
6) Butter - 1 Tbsp
7) Salt - as per taste
8) Asafoetida - 1/4 tsp
9) Oil for frying

Step 2: Making of Homemade Rice Flour especially for Murukku


1) Wash and Soak the raw rice for 2 to 3 hours.
2) Drain all the water from the soaked rice and spread it on the kitchen towel and allow it air dry for few hours (2 to 3 hours)
3) The rice should only be 90% dry and should have little moisture in it. That is what is preferred.
4) Then Grind the rice into a fine rice powder and sieve it gently 2 to 3 times.
Fresh Homemade Rice Flour is ready now !
Note:
The Soaked rice should not be sun dried. It should be dried in shade till it is 90% dry.

Step 3: Making the Murukku Dough


1) Wash and Soak the urad dal/black gram for 2 to 3 hours.
2) Grind the urad dal into a fine paste with little water and keep it aside.
3) In a bowl, add homemade rice flour, ground urad dal/black gram, asafoetida, butter, sesame seeds, chili powder, cumin seeds and mix well.
The Murukku Dough is ready now.

Step 4: Making the Ring Murukku


1) Take a small portions of the dough and roll it into a string of equal lengths.
2) Then pinch both the ends of the string to form a ring. Make as many required.
3) In a pan, add oil and heat to medium to high temperature.
4) Then add the murukku rings to the oil and keep frying till it turns golden brown.
Ring Murukku is ready now !
Continue reading →

Watermelon Strawberry Lemonade

0 comments


Watermelon Strawberry Lemonade is a very refreshing, easy to make drink especially during the summer. This super delicious summer drink will definitely impress your guests and also kids would love it.

Step 1: Ingredients

1) Watermelon cubed - 2 Cups
2) Strawberry chopped- 1/4 Cup
3) Lemon Juice - juice from 2 to 3 lemons
4) Sugar - 1/4 Cup (as per taste)
5) Water - 1 Cup


Step 2: Mix all ingredients


1) In a clean blender/mixer, add watermelon, strawberry, lemon juice and sugar.
2) Blend all ingredients until smooth (so that there are no chunks)
3) Now add the water and mix well. Check for the taste and adjust accordingly.
4) Store it in the refrigerator and serve chill !!!
Enjoy the hot summer day with chill Watermelon Strawberry Lemonade !!!


Continue reading →

Plastic Bottle Bird Feeder (Recycled Bird Feeder)

0 comments


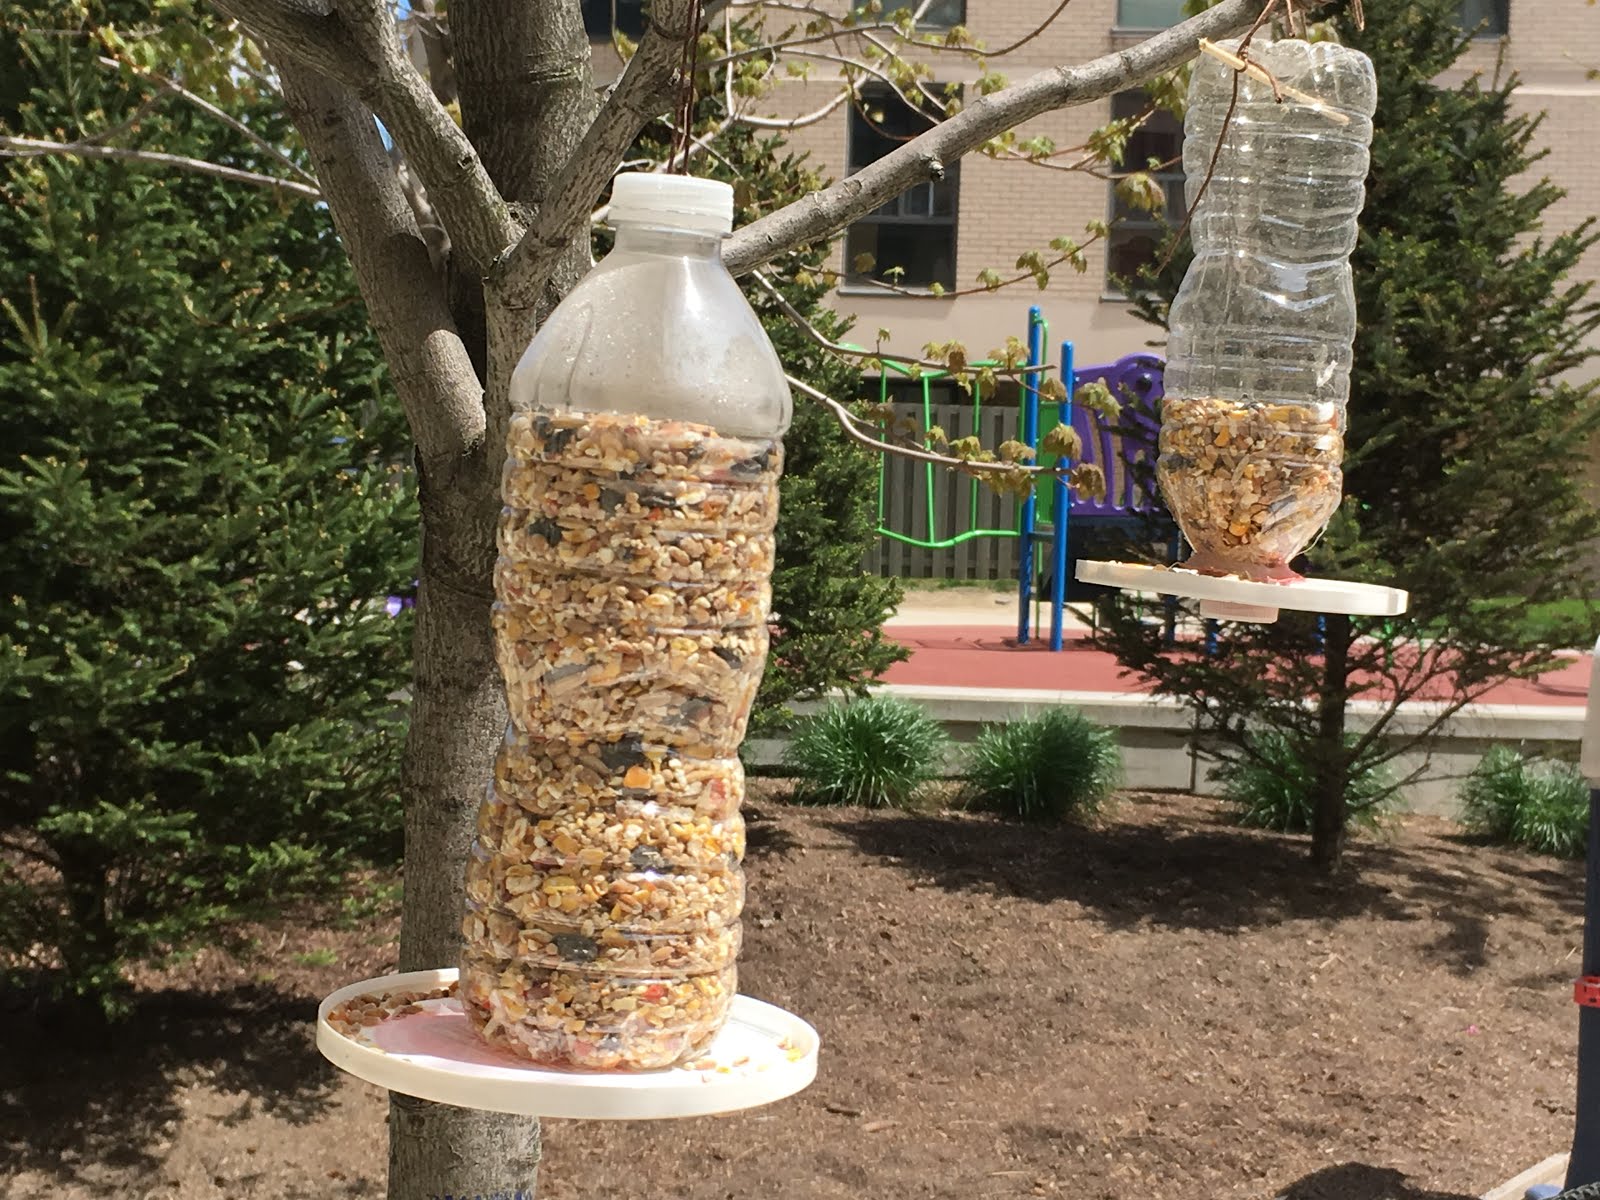
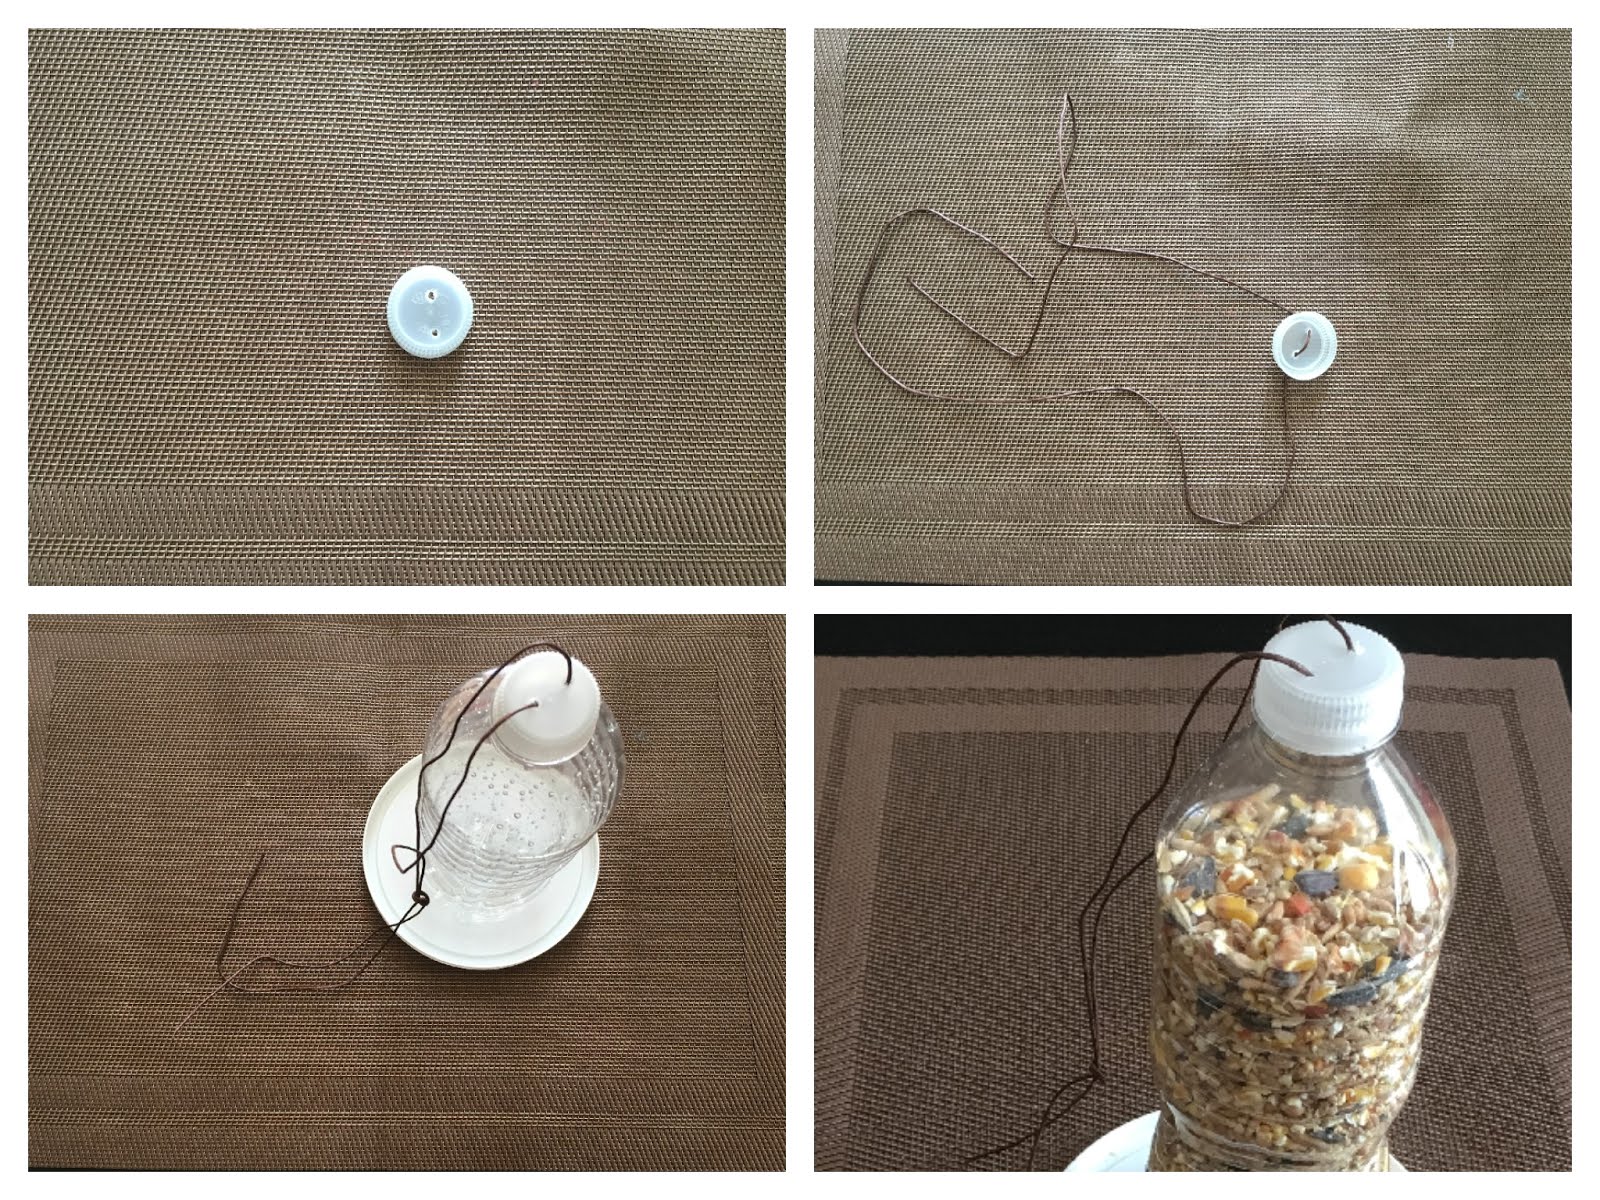
This Bird Feeder is very easy to make with the items that are available at home. Within 5 minutes the bird feeder will be ready. Fill the feeder, hang it on a tree and watch the birds eat on.

 Step 1: Items Required

1) Hot Glue Gun
2) Knife
3) Small Plastic Plate (yogurt box lid)
4) Water Bottle
5) String 2-3 feet Long
6) Bird Seed

Step 2: Making the Bird Feeder


1) To make the holes where the bird seed comes out, take the knife and make 3 rectangles around the base.
2) Then, cover the bottom of the water bottle in hot glue and quickly stick it onto the plate.
3) Next, take the cap of the water bottle and make two holes that are big enough for the string to go through. Loop the string through the holes.
4) Fill with bird seed and tie onto a tree branch. Next, wait for Birds to eat out of your recycled bird feeder!
Continue reading →